
BLUF (Bottom Line Upfront)
Keep an eye out for warning signs on your water heater and perform regular maintenance to avoid cold showers. In coastal North Carolina, sediment buildup and water quality can shorten a heater’s life, so flushing the tank yearly and checking the anode rod is key. If you suddenly have no hot water, check simple things first (pilot light, breaker), but always prioritize safety. Unusual leaks, odors (like rotten eggs), or loud rumbling noises mean it’s time to troubleshoot – and possibly call in a pro if the fix isn’t straightforward. Knowing when to DIY and when to call a professional can save you money and prevent damage to your home.
Top 10 Also-Asked Homeowner Questions (Water Heater Troubleshooting FAQ):
- Why is my water heater not producing any hot water?
- Why does my hot water run out faster or never get fully hot?
- Why won’t my gas water heater’s pilot light stay lit?
- What should I do if my water heater is leaking?
- Why does my hot water smell like rotten eggs (sulfur odor)?
- What causes a popping or rumbling noise in my water heater?
- Why is my hot water discolored or rusty-looking?
- Why does my tankless water heater go cold during a shower (or fluctuate in temperature)?
- How often should I flush or maintain my water heater?
- When should I call a professional for water heater problems instead of DIY?
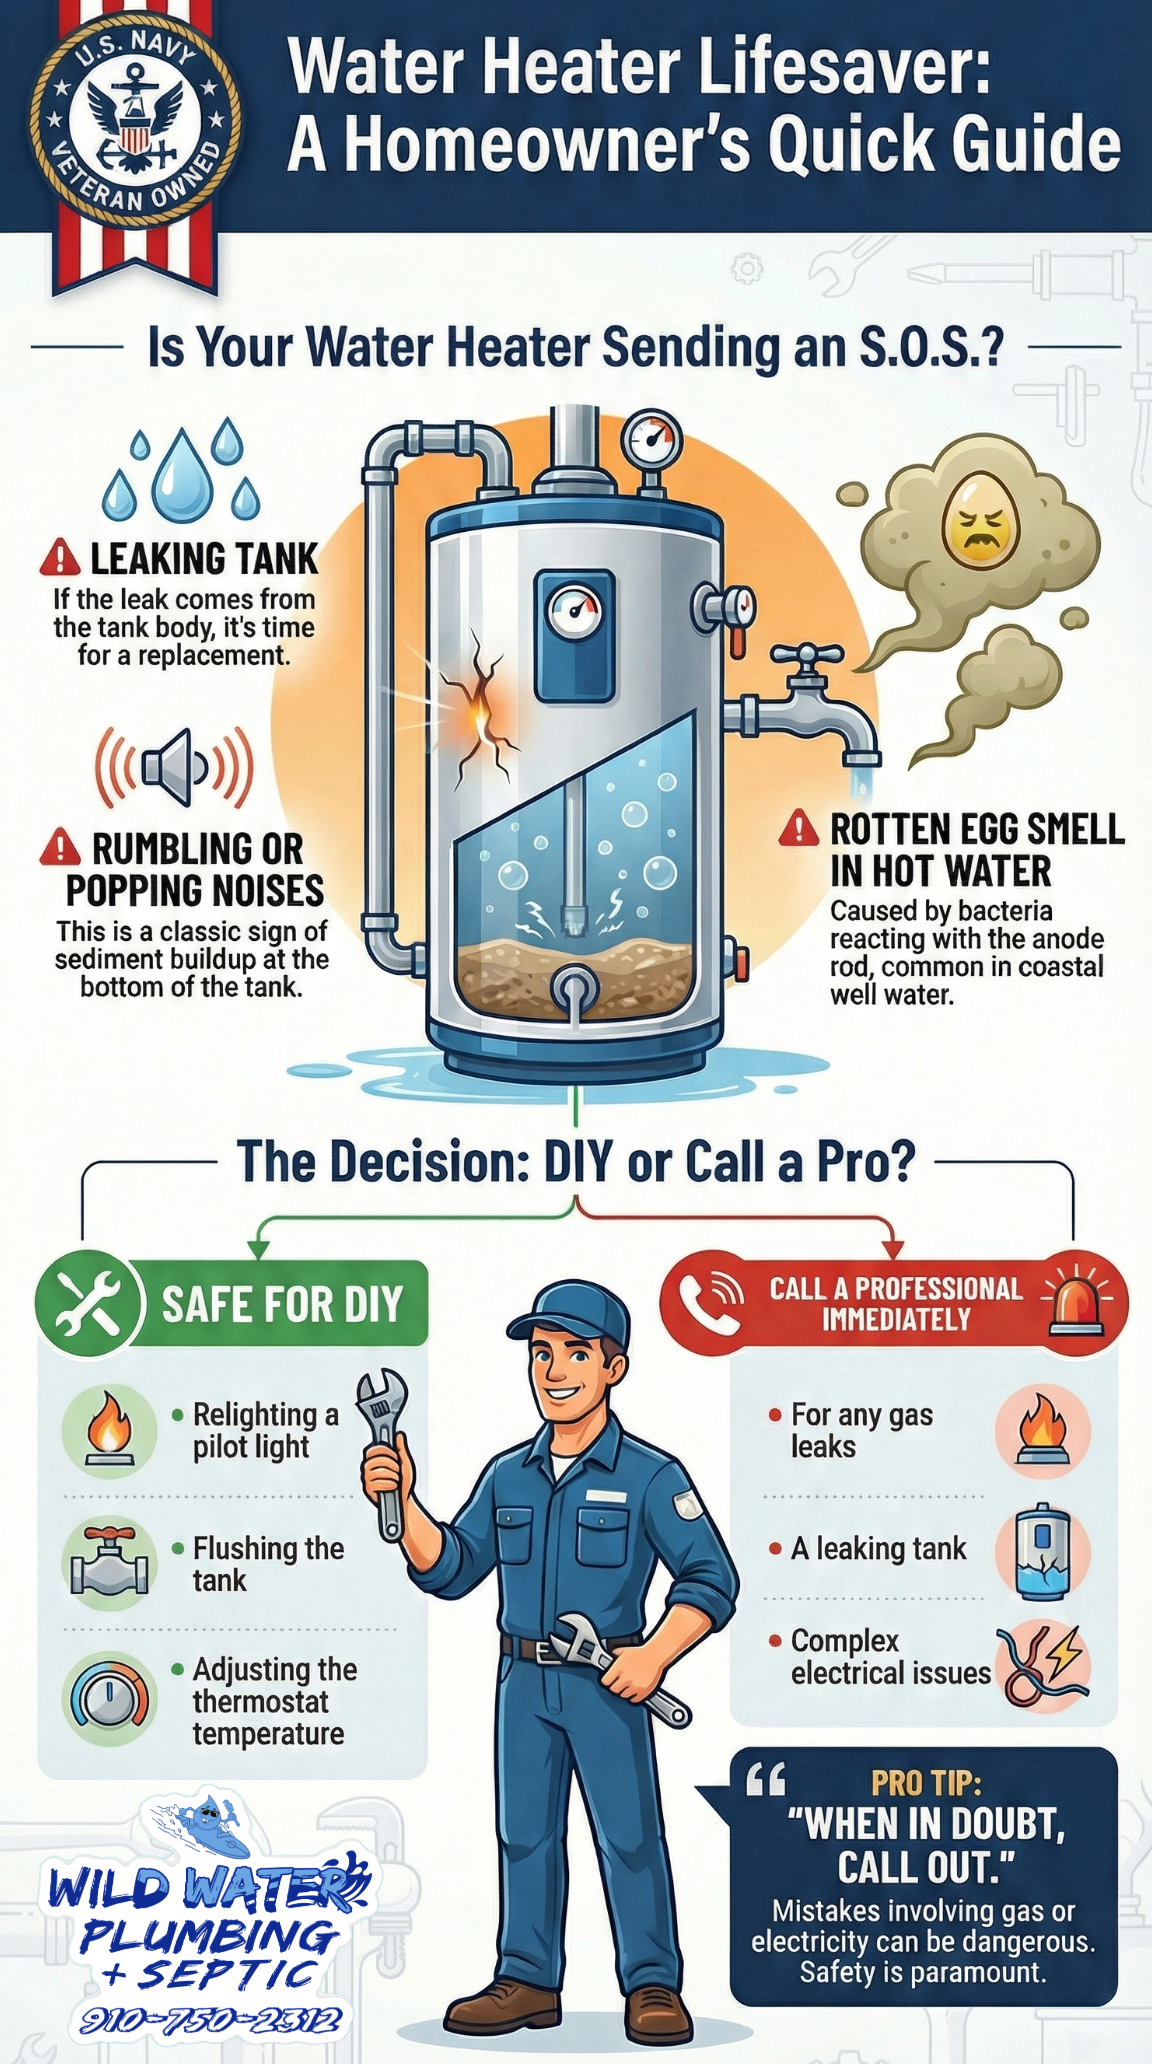
Table of Contents
Chapter 1: Understanding Your Water Heater – Types & Local Considerations
Hello, I’m Justin Wilder. As a long-time plumber serving Onslow, Carteret, Pender, and New Hanover counties, I’ve worked on countless water heaters. First, let’s identify what type of water heater you have and how our coastal NC conditions can affect it. Knowing your system’s basics will make troubleshooting a lot easier.
Common Water Heater Types: In our area, the three main types are gas tank-style, electric tank-style, and tankless (on-demand) units. A traditional tank water heater keeps a large reservoir of water hot 24/7, while a tankless unit heats water only when you need it. Gas heaters use a burner fueled by natural gas or propane, with a pilot light or electronic ignition; electric heaters use one or two heating elements inside the tank. Tankless heaters can be gas (common for whole-house units) or electric (often for point-of-use or smaller demands).
- Gas Tank Water Heaters: These typically have a pilot flame or spark igniter that lights a burner under the tank. Gas heats water fast, which is great for larger households. If you have natural gas service or a propane tank, you might have one of these. Gas units in coastal NC need proper ventilation to avoid corrosion from salty air, especially if installed in a damp crawlspace or garage. Keep in mind that after severe storms or hurricanes, gas supply can be disrupted or pilots blown out – something we’ll cover in troubleshooting. Gas heaters also have components like thermocouples (safety sensors) that can fail, especially with age or rust.
- Electric Tank Water Heaters: Very common in our region (especially in areas without natural gas lines). They use electric heating elements inside the tank. They’re generally reliable but heat water a bit slower. Electric heaters don’t have a pilot light, but they do have thermostats and high-limit safety switches. Coastal humidity can sometimes cause corrosion on electrical connections, so keeping the area dry and checking for rust on terminals is wise. After a power outage (not uncommon during hurricane season), an electric heater should come back on when power returns – if it doesn’t, there may be a tripped breaker or a fried component (we’ll troubleshoot that in Chapter 2).
- Tankless Water Heaters: These modern systems heat water on demand as it flows through the unit. They’re compact and energy-efficient (no standby heat loss), which many homeowners love. In coastal NC, I see more tankless units in newer or upgraded homes (often propane-fired in more rural areas, since not everyone has city gas). They provide endless hot water if sized correctly, but they can be sensitive to issues like water flow rate and mineral buildup. For example, our local water often has minerals (like calcium, magnesium, or iron). Over time, those can accumulate as scale inside a tankless unit’s heat exchanger, restricting flow or causing error codes. Tankless units have inlet filters that need periodic cleaning, especially if you have a well or older pipes that shed sediment. We’ll dig into tankless-specific problems in Chapter 4.
Local Water & Environmental Considerations: Coastal North Carolina offers some unique challenges (and benefits) for water heaters:
- Sediment & Mineral Buildup: Our water here can contain naturally occurring minerals like iron, manganese, and calcium. Homes on well water (common in parts of Onslow and Pender counties) might notice orange iron stains or sediment in their water. Even city water can carry fine sediment or have moderate hardness. When water is heated in a tank, minerals can precipitate out as sediment or scale. This sediment settles at the bottom of tank heaters and can cause problems: reduced heating efficiency, strange noises, or even clog the drain valve. In tankless units, mineral scale can coat the heating coils. Sediment buildup tends to be more common in certain coastal areas due to local water conditions. I often flush brownish sediment out of heaters in coastal communities – it’s just part of maintenance here.
- Water Quality (Odors and Corrosion): If your hot water smells like rotten eggs in this region, you’re not alone. Many coastal NC homeowners using well water encounter that sulfur (“rotten egg”) odor. It usually means harmless bacteria in the water are reacting with your heater’s anode rod (typically made of magnesium or aluminum) to produce hydrogen sulfide gas. Softened water (from a water softener) can increase this reaction too. The anode rod is a sacrificial metal rod inside your tank that prevents rust, but it can cause smelly water as a side effect. We’ll talk later about how to address that (one fix is using a different type of anode rod, like a zinc-alloy or powered anode, to combat the smell). Also, coastal utilities like those in New Hanover County have had incidents of industrial compounds (like GenX) – while those don’t typically affect heater function, it reminds us that water quality matters. High chloride levels (from saltwater intrusion or salt air) can make water more corrosive to the tank’s lining. Coastal regions may experience additional wear on water heaters due to minerals and salt content in the water supply. In short, our water might cause heaters to corrode a bit faster than in other places – all the more reason to stay on top of maintenance.
- Climate & Storms: We might not get harsh winters like up north, but coastal storms (hurricanes, tropical storms) can wreak havoc. Power outages are common during big storms, which can leave an electric water heater useless (until power returns) and can shut down a tankless unit (since the controls need electricity, even for gas models). If you have a gas tank heater, it might still work during power outages if it has a standing pilot light (many older models do) – but newer gas heaters with electronic ignition or power vents will also be down without electricity. Flooding is a major concern for water heaters in low-lying areas. I’ve seen garage or crawlspace-mounted heaters in Topsail and Carolina Beach get submerged during hurricanes. Unfortunately, a flooded water heater should almost always be replaced for safety. The burner, gas valve, and controls on a gas heater, or the electrical components on an electric heater, can become corroded or clogged with sediment when soaked. Manufacturers and safety experts (including the Gas Appliance Manufacturers Association) strongly recommend replacing any flood-damaged water heater rather than trying to fix it. If you’re in a flood-prone area, consider elevating your water heater or installing it on an upper floor if possible. And after any storm or evacuation, always check your heater: If it was exposed to flood water, don’t relight or turn it on until a professional inspects it. Also, after a storm, if you smell gas or see water around the heater, call a pro immediately – do not attempt to start it.
- Lifespan Expectations: With proper care, a water heater can last for years, but coastal conditions may shorten that a bit. Typically, a tank-style water heater lasts ~8-12 years before corrosion or wear leads to failure, while tankless water heaters can last 15-20 years with proper maintenance. I often find that in our area, the higher mineral content means tanks tend to be on the lower end of that range unless they’re well-maintained. Regular flushing to remove sediment can extend a tank’s life by preventing internal rust spots. Replacing the anode rod every few years can also significantly extend the tank’s life by preventing tank corrosion. We’ll discuss maintenance steps as we go, but keep these numbers in mind – if your tank heater is, say, 10+ years old and giving a lot of trouble, replacement might be more sensible than repeated repairs.
Summary: Knowing whether your heater is gas or electric, tank or tankless, and understanding our local water quirks provides a foundation. The rest of this guide will walk you through troubleshooting common issues. When we mention specific fixes, I’ll often note whether they apply to gas vs. electric or tank vs. tankless. Now that we’ve covered the basics and local considerations, let’s dive into the most urgent homeowner question: “Why do I have no hot water?”
Chapter 2: No Hot Water? Diagnosing the Problem
Few things are more panic-inducing on a morning than turning on the tap and finding no hot water at all. Don’t worry – we’ll take this step by step. I approach a “no hot water” call like a detective, starting with the simplest potential causes and working up. Here’s how you can diagnose it like I do:
1. Check the Basics – Power or Pilot:
- Electric Heaters – Look at the Breaker: If you have an electric tank heater and the water’s gone cold, the very first thing I’d check is your electrical panel. A tripped circuit breaker is a common culprit for no hot water. If the breaker for the water heater has tripped to the middle or off position, there’s no power going to the heater. Reset it by switching it off and on. If it immediately trips again, that signals an electrical fault (possibly a bad heating element or a wiring short) – at that point, skip ahead to calling a pro, because something deeper is wrong.Also, many electric water heaters have a built-in high-temperature cutoff switch (often a red button on the thermostat under an access panel). This can trip if the water got too hot due to a thermostat failure. You can reset it by pressing that red button (after shutting off power for safety). If the heater kicks on after a reset and heats properly, monitor it – if it trips again soon, the thermostat may be bad and needs replacement.
- Gas Heaters – Check the Pilot Light: For gas tank water heaters, no hot water usually means the pilot light has gone out (or failed to ignite if you have an electronic ignition model). First, remove the small access door at the bottom and peek inside (use a flashlight) – do you see a little flame? If not, follow your manufacturer’s pilot lighting instructions (usually printed on the tank). Generally, you’ll set the gas control knob to “Pilot,” press it down, and use a long lighter or the unit’s igniter button to light the pilot flame. Hold the button for 30-60 seconds after lighting, then release and turn the knob to “On.” Important: If you smell a lot of gas while doing this and the pilot doesn’t light, stop and ventilate the area – you may have a gas supply issue.
If the pilot won’t light or stay lit, there could be a few causes. One common issue is a bad thermocouple – that’s the small copper sensor that the pilot flame heats. It signals the gas valve to stay open when the pilot is lit. If it’s faulty or dirty, it might shut off the gas, killing the pilot. Sometimes you can gently clean the thermocouple with steel wool or fine sandpaper to improve the connection (after turning the gas off!). A weak flame that barely touches the thermocouple can also cause it to shut off – this might mean the pilot tube or orifice is dirty and needs cleaning. Another possibility is a problem with the gas supply itself: ensure the gas valve is fully open (the shutoff valve on the gas line should be parallel to the pipe). If you recently had your propane tank refilled or gas service interrupted, there could be air in the line – you may need several attempts to purge air before the pilot lights.
Modern gas heaters with electronic ignition (no standing pilot) will have a status light that might blink error codes. If your unit’s resettable, you can try cycling the power to it (turn it off and on) to see if it will ignite. If it still fails, common issues include a faulty igniter, a flame sensor problem, or gas pressure issues. At this stage, if basic pilot lighting doesn’t work, it might be time to call for service – gas troubleshooting beyond relighting is usually a pro’s territory, as it can involve replacing parts like the thermocouple, gas control valve, or igniter.
- Tankless Units – Power and Fuel: If you have a tankless water heater and suddenly have no hot water at all, start by checking if the unit has power (is the display on or any lights?). Even gas tankless units need electricity for the fan and controls. If the unit is completely dead, check the breaker (and any inline switch). If it has power but won’t fire, see if an error code is displayed. One common oversight: if your tankless is propane-fired, verify that your propane tank isn’t empty (I’ve responded to “no hot water” calls that turned out to be out-of-gas situations!). Also ensure the gas shutoff valve is open. A tankless may refuse to ignite if it senses an inadequate gas supply or if the water flow is below its minimum. Try opening a hot tap fully to ensure sufficient flow. If you hear the unit trying to start (clicking or whooshing) but no hot water comes through, it could be an ignition failure. Ignition failure on tankless systems is often due to gas issues: low gas pressure, an empty propane tank, or a mis-adjusted regulator. Another cause can be an internal fault like a bad igniter or flame sensor. You can attempt a reset (many units have a reset procedure or you can cycle power). If the problem persists, note the error code (if any) – you may need a technician to service it.
2. Is it Truly No Hot Water Everywhere?
This might sound obvious, but check multiple faucets (kitchen, bathroom) to confirm the issue is the water heater and not a single fixture. If only one faucet has no hot water but others do, the problem could be with that faucet’s mixing valve or an isolated plumbing issue, not the heater. Usually, though, if the water heater fails, all your taps will be running cold.
Also, determine if it’s completely cold water or just lukewarm. If you get lukewarm water that never gets hot, or if the hot water runs out much faster than it used to, that’s a slightly different problem than absolutely no hot water. Lukewarm water could mean one of the heating elements in an electric heater has burned out – so the tank is only half-heating. (Most electric heaters have two elements; if the top element fails, you often get no hot water at all, but if the bottom element fails, you get a small amount of hot water that quickly turns cold.) Inconsistent or insufficient hot water can also point to a thermostat issue (e.g., set too low or not functioning correctly) or sediment coating the elements or bottom of the tank (which makes heating inefficient). In gas heaters, inconsistent temperatures or water not getting fully hot may indicate a gas control or burner issue, or simply a thermostat set too low. Try adjusting the thermostat up a bit (aim for around 120°F; don’t exceed 140°F for safety). If that doesn’t help, and especially if the water gets hot then suddenly cold, you might have a dip tube problem. The dip tube is an internal pipe that sends cold incoming water to the bottom of the tank; if it breaks (which can happen in older tanks), cold water can mix at the top and give you lukewarm output. A broken dip tube or heavy sediment could cause the “runs out too fast” symptom.
If you have a tankless heater that’s giving some warm water, then cold, or fluctuating, we’ll address that in Chapter 4 (it could be a flow issue or “cold water sandwich” effect).
3. Other Quick Diagnostics:
- Indicator Lights or Error Codes: Many newer water heaters (tankless and some tank models) have indicator lights. A blinking light on a gas valve, for example, might indicate a fault code – check your manual for what a blinking red light means. Some electric heaters have a “powered” LED that indicates power – if that’s off, again check the breaker.
- Hear any activity? With an electric heater, you normally won’t hear much. But with a gas heater, when it’s trying to heat, you should hear the burner roaring softly. No sound and no flame suggest the burner isn’t igniting (pilot out or control issue). With a tankless, you might hear the vent fan when it attempts to fire – if you hear clicking and whooshing but no hot water, likely an ignition failure as discussed.
- Hot water for a short time then cold? If your heater starts to give hot water and then it goes cold quickly, that points to a few specific issues. In electric heaters, this could again be the lower element not working – you get hot water from the top of the tank, then nothing more. In gas heaters, it could mean the burner is shutting off too soon – perhaps the thermostat is cutting out or there’s a flue/clog issue causing it to overheat and shut off. Also, check that the flame is proper if you can see it: a healthy gas flame under a tank should be mostly blue. A lazy yellow flame could mean insufficient air or dirty burner, which might heat poorly (though that usually causes other symptoms like soot).
- Multiple Appliances Straining Capacity: Sometimes, nothing is actually “broken.” If you suddenly have no hot water simply because several showers ran back-to-back (and perhaps laundry too), your heater may just be undersized for that peak demand. This is where knowing your tank size and recovery rate matters. A typical 50-gallon electric heater can deliver only so much hot water per hour. If this scenario fits, the “fix” might be staggering usage or considering an upgrade (or adding a tankless booster). For tankless owners, if you’re running too many fixtures at once, the unit might reduce heating or even shut down (some will show an overload code). We’ll cover that in Chapter 4’s discussion on “system overload.” But in general, if capacity is the issue, you would notice the hot water gradually cooling during usage, not an all-or-nothing sudden loss.
4. After Basic Checks – Still No Hot Water:
If you’ve verified power/gas is on, pilot is lit (for gas), and you’re confident it’s not just a demand/capacity issue, and you still have no hot water, then the cause is likely a component failure that may require repair or replacement:
- Heating Elements (Electric): A bad upper heating element or a faulty thermostat can result in no hot water. Testing or replacing these involves electricity and water – only do this if you’re comfortable and have turned off power. You can use a multimeter to check element continuity. Many homeowners choose to call a plumber at this point. The fix would be installing a new element or thermostat.
- Gas Control Valve/Thermostat: If the pilot is on but the main burner won’t fire at all (and you’ve set the thermostat to a hot setting), the gas control valve (the thermostat unit on the tank) may be bad. Replacing that is a job for a professional. Similarly, on a tankless, a faulty sensor or control board could be the culprit if all else is ruled out.
- Severe Sediment Buildup: Believe it or not, I’ve seen a couple of cases where so much sediment built up in a tank that it actually buried the lower heating element and caused the upper element to do all the work – leading to very short hot water supply. If a tank hasn’t been flushed in many years, this can happen. The element can even burn out because it overheats in the sediment. If you suspect this (maybe you hear gurgling or popping noises when it last tried to heat), a good flush could help (see Chapter 3 on noises for flushing tips), but if elements are burned out you’ll still need to replace those.
- Frozen Pipes (Rare here, but possible): On the off chance we get a cold snap and your hot water pipes or the inlet to the heater froze, you might get no flow of hot water. This is more of a plumbing issue than the heater itself – and in coastal NC it’s not common except maybe in poorly insulated beach houses during an unusual freeze. If pipes are frozen, you’ll need to thaw them carefully and insulate to prevent bursts.
At this point, if you haven’t found an easy fix, it’s likely time to call a professional for a diagnosis. A lack of hot water could require replacing heating elements, repairing gas valves, or other technical fixes that a licensed plumber or electrician should handle for safety. In Chapter 5, we’ll outline clearly when to DIY and when to bring in the pros.
But before that, let’s move on to other common (though perhaps less urgent than an ice-cold shower) water heater issues: leaks, weird smells, and strange noises. These symptoms can be just as troubling and are warning signs of underlying problems.
Chapter 3: Leaks, Odors & Noises – What They Mean
Water heaters often give off early warning signs before a major failure. Three big red flags are leaks, odd odors in your hot water, and unusual noises from the heater. In this chapter, I’ll share what each of these signs might indicate and what you should do about it.
Leaks: Drips, Puddles & What to Check
Finding a leak around your water heater is alarming. Even a small drip can gradually cause serious water damage (or a big mess, at least). Here’s how to troubleshoot leaks:
- Top or Side Leak (Fittings & Valves): If you notice water on top of the tank or dripping down the side from the piping, the leak could be from the cold water inlet or hot water outlet connections. These are where your plumbing connects to the heater, usually at the top. In coastal NC’s humid climate, condensation can sometimes form on cold pipes, so make sure it’s truly a leak. If it’s actively dripping, try gently tightening the connection with a wrench (just a quarter turn – don’t overdo it). Another top-side component is the T&P valve (Temperature & Pressure relief valve). This safety valve is usually on the top or upper side of the tank with a pipe attached. If you see water dripping from the end of that pipe (which often runs down the side of the tank or into a drain), the T&P valve might be releasing water. It’s designed to open if either temperature or pressure in the tank gets too high. Causes for T&P valve leaks: the tank is overheating (thermostat too high or malfunctioning), excessive pressure (often due to a bad expansion tank or pressure regulator in the house), or the T&P valve itself is faulty. In our area, high incoming water pressure can sometimes cause the T&P to drip – many homes here have pressure reducing valves, but if yours fails, pressure can creep up and occasionally lift that T&P.You can test the T&P valve by carefully lifting its little lever (be cautious: hot water will come out the discharge pipe). It should spring back and reseal when you let go. If it doesn’t reseal or keeps leaking, the valve may need replacing. Given the importance of this safety device, if it’s leaking continuously, call a plumber to evaluate the cause and replace the valve if needed.
- Bottom Leak (Tank or Drain): If you find water pooling under the heater, determine if it’s coming from the drain valve at the bottom or the tank itself. The drain valve (where you attach a hose to flush the tank) can leak if it’s not fully closed or if its washer is bad. I’ve seen plastic drain valves that cracked – if so, they’ll need replacement (which can be tricky – often a pro job). Try tightening the drain valve snugly; if it still drips, you might cap it temporarily and plan to get it replaced. Now, the worst-case scenario: water leaking from the tank’s bottom seam or through the steel body. This usually means internal corrosion has perforated the tank – essentially a death sentence for the water heater. Sediment buildup can accelerate internal rusting at the bottom of the tank. If your tank itself is leaking, there’s no fix; it’s replacement time. I often tell homeowners, it’s like a car with a rusted-out frame – you can’t patch it reliably. Turn off the heater (gas supply or electricity) and the water supply to it to stop the leak, and call a professional to discuss a new unit.
- Signs of Leakage to watch for: Sometimes you don’t see an obvious drip, but you might smell dampness or see a rust streak. Look for rust or white limescale buildup around fittings – that can indicate slow seepage that dried. Check the around the base for any moisture. If you have a tankless unit, leaks are less common but can happen at pipe joints or if an internal component like the heat exchanger cracks (in which case you’d likely get an error code from a sensor). Any leak inside a tankless will usually trip a sensor and shut it down.
- What to do if you find a leak: For small leaks from a valve or fitting, you can manage briefly: place a bucket or towel to catch water, and don’t panic. If it’s a major leak (water gushing or a ruptured tank), immediately shut off the cold water inlet valve to the heater to stop the flow and turn off the heat source (gas valve to “off” or electric breaker). This prevents flooding and a dangerous situation. Remember that even small leaks merit attention – they rarely fix themselves and usually get worse. A dripping T&P valve, for example, might seem minor, but it could suddenly pop open if pressure spikes, releasing a lot of hot water. Water + electricity in an electric unit is also a hazard if leaks reach internal wiring. So don’t ignore persistent leaks.
In coastal NC homes, I often replace heaters not because they completely stopped working, but because they started leaking due to age and corrosion. Salt air can even rust the outside jacket faster – I’ve seen the bottom rim of tanks in beachside homes rust out. Annual inspections can catch a slow leak before it turns into a flooded floor.
Odors: Rotten Eggs or Metallic Smells in Hot Water
Foul smells coming from your hot water taps can be very off-putting. The classic “rotten egg” odor (sulfur smell) is the most common complaint, and it usually has to do with the chemistry inside your tank:
- Rotten Egg Smell: If you notice that only your hot water has a sulfuric, rotten egg odor (while cold water is fine), it’s almost certainly caused by sulfate-reducing bacteria reacting with your tank’s anode rod. These bacteria are often present in well water or even sometimes in municipal water. They aren’t harmful to your health in the low concentrations that cause odor, but the smell is nasty. The anode rod (magnesium or aluminum) creates a reaction that generates hydrogen sulfide gas in water, hence the smell. Solution: There are a few approaches. One is to “shock” the water heater with a disinfectant: for instance, flushing the tank and then adding a dilute hydrogen peroxide solution to sit in the tank for a while can kill bacteria. Another is to replace the anode rod with a different type. I often install zinc-alloy anode rods for clients with this issue – the zinc content helps combat the odor by poisoning the bacteria just enough. In severe cases, a powered anode rod (which uses an electrical current and doesn’t rely on sacrificial metal) can solve the odor permanently – these are more expensive but effective, especially if you also have a water softener (softened water tends to make the smelly reaction worse). I do not recommend simply removing the anode rod entirely, which some folks do to stop the smell. Yes, it will stop the smell because you removed the source, but you’ll also void your tank warranty and invite rapid corrosion of the tank (the anode rod is there to corrode so that the steel tank doesn’t). It’s a trade-off not worth making in my opinion. Stick with a proper anode replacement.Once you’ve addressed the cause, flush out the tank with fresh water. It may take a little while for the smell to fully dissipate from your pipes. Also consider increasing the water heater temperature to ~140°F for a few hours (do this carefully and avoid using the scalding water) – higher heat can kill off remaining bacteria. Just remember to turn it back down to normal (120°F) afterward for safety and energy savings.
- Other Odors (Metallic, Rusty, or Garlic-like): A metallic smell or taste in hot water could indicate metal corrosion inside the tank. If your anode rod is completely spent, the tank itself might start to rust, which can give a metallic odor and taste, often accompanied by rusty-colored water. If you see brown or reddish tint in your hot water along with a metallic smell, that’s a sign of internal corrosion or rust sediment. You should inspect (or have a pro inspect) the anode rod and consider replacing the heater if it’s very old and rusting out.
Sometimes people report a “garlic” smell right when a gas water heater burner fires up. A faint garlic or onion odor can be an additive from LP gas (propane) when it first lights, or it could be dust burning off. But if you smell gas (like the rotten egg mercaptan odor of natural gas/propane) around your unit even when it’s off, that’s a gas leak – turn off the gas and ventilate, then call the gas company or a plumber immediately. - Odors in Both Hot and Cold Water: If both hot and cold smell bad (and it’s not a gas leak situation), then the issue is likely with your water source (maybe your well or local water supply) rather than the heater. For example, a high iron content can sometimes give water a metallic or even a musty smell. In coastal NC, some well water has hydrogen sulfide naturally. In such cases, a whole-house water treatment system (like an aeration system, chlorinator, or carbon filters) might be the long-term solution. But that’s beyond the water heater scope. Just know that the water heater can amplify certain odors (hot water opens pores of anode and drives gases out). If you suspect source water issues, getting your water tested is a good idea.
Quick Tip: To confirm if the smell is coming from the heater, do this: fill two buckets – one with hot water only, one with cold water. Compare their smell. If only the hot bucket stinks, you’ve zeroed in on the heater/anode as the culprit. If both stink equally, the problem is upstream in the water supply.
Noises: Popping, Rumbling, Sizzling & More
Your water heater shouldn’t be the loudest appliance in your house. If it’s making noise, it’s trying to tell you something. Let’s decode those sounds:
- Rumbling or Popping Noises (Like a boiling kettle or popcorn): This is the classic sound of sediment buildup in a tank water heater. Over time, sediment (mineral deposits, sand, debris) settles at the bottom of your tank. When the burner comes on (for gas heaters) or the lower heating element heats up (electric heaters), water trapped in that sediment layer turns to steam bubbles that escape with a pop or rumbling sound. It can sound like a low rolling boil or popping popcorn. The noise itself isn’t dangerous – your tank’s not going to explode from it or anything – but it does indicate your heater is not running efficiently. That layer of sediment is acting like an insulator, so the burner’s heat isn’t transferring to the water as quickly. In fact, too much sediment can eventually cause the bottom of the tank to overheat and deteriorate, leading to leaks. So you definitely want to address it. The fix is to flush your water heater to remove sediment. Here’s how I usually advise homeowners to do a basic flush:
- Turn off the heater (set gas to “Pilot” or thermostat to off; for electric, shut off the breaker) to avoid the heating elements coming on while draining.
- Connect a garden hose to the drain valve at the bottom. Run the hose to a safe drain location or outside (beware the water will be hot!).
- Open the drain valve and carefully open the T&P relief valve or a hot water tap in the house to let air in – this will help water flow out faster.
- Drain a few gallons out, then briefly turn on the cold water supply to the heater to stir up sediment and push it out the drain. Do this in bursts – you can actually leave cold water running through and out the hose for a more thorough flush once it’s mostly drained.
- Close the drain, close the T&P, let the tank refill, and then restore power or relight the burner.
Even a partial flush – say draining 5-10 gallons – can remove a lot of sediment and often quiet the heater down. Energy tip: The Department of Energy recommends flushing a small amount (like a quart) from the tank every few months to prevent excessive sediment. Realistically, few homeowners do it that often, but doing a full flush annually is a great practice (especially in areas with our water). It’s part of regular maintenance that can prevent the popping noises and help your heater last longer. If after flushing you still hear a lot of noise, some sediment may be hardened; a second flush or professional deliming might help, but at some point if the sediment is huge, consider it in your replacement timeline.
- Sizzling or Hissing Sounds: A sizzling noise often means water is dripping onto a hot surface. If you have a gas heater and you hear a hiss/sizzle when the burner is on, check for water dripping onto the burner – this could be from a small leak above, like from that T&P valve or a plumbing connection, hitting the hot burner. Alternatively, on an electric heater, a hiss could be the sound of a heating element energizing in air or sediment instead of water (which means the element is too hot). This might happen if the tank isn’t completely full (elements should always be submerged) or if sediment exposure has caused the element to overheat. If you hear a faint sizzling when the tank is recovering, it might just be normal thermostatic expansion of metal or a bit of moisture burning off. But a loud sizzle warrants a look for leaks.
- Knocking or Banging (Water Hammer): Sometimes after the water heater shuts off or a tap is turned off, you might hear pipe banging. This isn’t exactly the heater itself but the pipes experiencing water hammer – a sudden stop of water flow causing a pressure shock. It can happen with any fast-closing valve in your plumbing. If your heater has a heat trap valve or check valve, occasionally the flow stopping can cause a thump. The cure for water hammer is installing hammer arrestors (spring-loaded cushions in the lines) or an expansion tank if high pressure is an issue. If you only hear knocking right when the heater finishes a heating cycle, it could be just the metal tank contracting or expanding – a tick or knock can occur as the tank cools or heats. Generally, water hammer is more of a whole-house plumbing concern, but I mention it here in case you associate it with the heater.
- Ticking, Tapping, or Light Knocking: Some gas heaters make ticking sounds as the metal parts expand when heating – for example, the flue pipe or the tank itself can tick. This is usually harmless. Also, heat trap nipples (special fittings on newer heaters to save heat) have little moving parts that can rattle or tick sometimes. If it’s bothersome, a plumber can often mitigate it (sometimes by adding a short piece of hose or adjusting piping to relieve stresses).
- Roaring or Loud Burner Noise: A gas burner that’s dirty or getting too much/too little air can make a roaring sound or a whooshing that’s louder than normal. If you notice your burner is very noisy or has a fluttering sound, it might need adjustment or cleaning (the air shutter might be mis-set or there could be spiderwebs in the burner tubes – yes, that happens). This is more of a tune-up issue.
- Tankless noise: Tankless water heaters have their own sounds – a low hum of a fan, maybe a slight ticking when igniting. But if you hear boiling or kettling in a tankless, that could mean scale buildup in the heat exchanger. A tankless that’s scaled can sometimes make a kettling noise as water flash-boils in hot spots. The fix is to do a descaling flush (pumping vinegar or a chemical descaler through the unit – see Chapter 4). Also, if you hear a loud vibrating or rattling from a tankless, check that it’s securely mounted – the vibration of the unit when the fan and burners run can shake loose mounting brackets or nearby pipes.
In summary on noises: Don’t ignore them. Rumbling/popping = sediment (flush your tank). Persistent ticking/knocking = possibly thermal expansion or minor issues (monitor, or call a pro if loud). Any sudden loud bang or popping of relief valve = immediate check (could be overpressure – very important to address). By taking action when you hear these sounds, you can often prevent a bigger issue. For instance, flushing the tank when you first notice pops can prevent heating inefficiency and future leaks.
Lastly, consider safety: if you ever hear a boiling sound accompanied by water or steam escaping, shut off the heater and water supply and get out if needed. This could mean the tank is over-pressurized (extremely rare thanks to T&P valves – they usually vent before anything like that). I’ve never encountered an actual boiling tank in the field, and modern heaters won’t normally let that happen. But I mention it to be thorough: unusual noises should never be ignored.
Now that we’ve covered the static tank-style heaters, it’s time to focus on the on-demand systems. Tankless water heaters are popular in many NC homes, and while they avoid some of the above issues (no tank means no sediment layer to pop in the same way, for example), they have their own set of quirks. In the next chapter, we’ll troubleshoot tankless troubles: from fluctuating temperatures to maintenance needs.
Chapter 4: Tankless Troubles – Flow, Ignition & Maintenance
Tankless water heaters (also called on-demand heaters) are great when they’re working properly – endless hot water, higher efficiency, smaller footprint. I’ve installed quite a few in coastal NC homes. However, they can perplex homeowners when an issue arises, especially if you’re used to old tank heaters. Let’s go through common tankless problems and how to address them.
1. “My tankless runs hot, then cold, then hot again” – The Cold Water Sandwich:
If you’ve noticed that when taking a shower, you get a burst of hot water, then a blast of cold, then hot resumes, you’ve experienced the cold water sandwich. This is a quirk of tankless systems and not exactly a “fault.” It happens because when you turn off a hot water tap, there’s still some hot water in the line between the heater and the faucet. The next time someone opens the tap shortly after, that slug of hot water comes out first (a brief warm burst), then it’s followed by cold water that was sitting in the pipes (since the heater hadn’t fired on yet), and finally the tankless produces hot water again which arrives after a few seconds. Solution: There’s no way to fully eliminate this; it’s inherent to how tankless heaters work. Knowing this, you can avoid jumping into the shower immediately – let that cold section pass through. Some newer systems include a small buffer tank or a recirculation feature that minimizes this effect, but most standard units will have a small sandwich. So this is more about awareness than repair. If the cold gap is excessively long, it might be due to a long distance between heater and fixture – consider a small point-of-use heater or recirculation pump if it really bothers you.
2. “My tankless water turns cold when I open a second tap” – Flow Rate Overload:
Tankless units are sized by their maximum flow rate at a given temperature rise. If you have a unit that can handle, say, 4 gallons per minute of hot water and you try to run two showers and a washing machine at the same time, you might exceed its capacity. What happens then varies: some units will reduce the temperature of the water (so everyone gets warm, not hot, water) if flow is too high, while others might even shut down and give an error (essentially saying “overload”). If your tankless frequently can’t keep up, you may need to limit simultaneous usage or consider upgrading to a higher-capacity model or adding a second unit in parallel. One trick to confirm overload is to run just one fixture at a time – if hot water is fine one-on-one but not when two are on, it’s likely a capacity issue, not a mechanical failure. Overloads can also occur if incoming water is much colder than usual (in winter the well or city water might be colder, reducing output capacity). In coastal NC, our ground water isn’t frigid, but a winter temperature drop can reduce tankless GPM output slightly. Solution: Stagger appliance use (don’t run dishwasher and shower simultaneously, for example). If that’s not practical, you might need a system upgrade. Also check your model’s filter (many tankless have an inlet filter screen) – a partially clogged filter will reduce the unit’s flow capacity and can mimic an overload by starving the unit of water.
3. Ignition or Flame Failure – “My tankless isn’t igniting (or keeps shutting off)”:
This is a big one: You open the hot tap, but you get cold water and perhaps your tankless unit is flashing an error code. Common error codes on tankless units often correspond to failed ignition or flame loss. Let’s break down possible causes:
- Gas Supply Issues: Tankless heaters demand a strong gas supply when they fire. If you have propane, ensure the tank isn’t empty and the gas valve is open fully. A partially closed valve or a failing gas regulator can prevent enough gas from reaching the unit. If you recently installed the unit and it’s shutting off, sometimes it’s due to the gas line being undersized for the BTU load (tankless need a higher BTU input). Low gas pressure will cause flame failure – the unit’s sensors will shut it off for safety. Natural gas users: if flame failure happens on very cold days, it’s rare but possible the gas pressure from the utility dipped (or if there’s an obstruction in your gas meter regulator – not common, but I’ve seen insects nest in regulators causing pressure drop).
- Air Supply or Exhaust Blockage: Tankless units have fans that draw in combustion air and push out exhaust. Any blockage in the vents can cause shutdown. For example, a bird might decide your vent pipe is a nice warm spot and partially block it (I’ve found wasp nests in intake pipes!). Or debris from a storm could clog an outdoor vent termination. Tankless systems typically display an error code for vent problems. The solution is to inspect and clear any obstructions. Also, check that vents are properly connected and not crushed or disconnected.
- Dirty Flame Sensor or Burners: Over time, the flame sensor rod in a gas tankless (or the burners) can get carbon buildup. If the sensor doesn’t detect flame, it will shut gas off (even if the flame is actually there). A quick fix is often to gently clean the flame sensor with steel wool. This is something a tech would do during maintenance. Burners can also get a bit dirty; if you’re comfortable, you might consult your manual on how to remove and clean them, or have it done during a service call.
- Water Flow Sensor Issues: Tankless units only ignite when they sense enough water flow. If your flow sensor is stuck or clogged, the unit might not ignite at all or might cut out. Water quality issues can gum up these sensors. Cleaning or replacing a flow sensor might be needed – which is again a more advanced fix. One clue is if small flow fixtures (like a trickling faucet) don’t trigger the heater anymore when they used to – that suggests either a clogged inlet filter (reducing perceived flow) or a sensor issue.
- Error Codes: Each brand/model has its codes (e.g., “EC: 11” might mean ignition failure, “EC: 90” could mean combustion abnormal, etc.). When in doubt, use the error code and consult the manual or call tech support. Many tankless manufacturers have tech lines that homeowners can call. They’ll walk through steps, which often include the things above.
If your tankless suddenly isn’t working at all and you can’t figure out why, a simple thing to try is a system reset. Turn off the unit’s power for 30 seconds and turn it back on. Some units have a reset button. This can clear minor electronic glitches.
4. “My water is too hot or temperature fluctuates” (when not overloading):
If you experience fluctuating water temperature during a single usage (not the cold sandwich scenario, but an ongoing oscillation or occasional cold spike), a few things could be happening:
- Minimum Flow Rate: If you’re running a very low flow (like a trickle), some tankless heaters have trouble maintaining a stable flame. They may cycle on and off if the flow drops below their threshold, causing hot-cold-hot pulses. For instance, if you’re taking a shower and someone slightly closes a valve reducing flow, the unit might turn off momentarily. Solution: Increase flow slightly or if it’s a common issue, consider a model with a lower minimum firing rate or install a bypass valve that allows a small flow to keep it active.
- Thermostatic fluctuations: Tankless units modulate burner output, but if there’s scale in the heat exchanger, it can overheat then undershoot. Scaling (mineral buildup) can cause erratic temperatures because it insulates the heat transfer and can cause the unit to overshoot then shut down temporarily to avoid overheating. The best fix is to do a descaling flush. Professionals or handy homeowners use a pump, hoses, and usually white vinegar or a chemical descaler to circulate through the tankless for about an hour, dissolving mineral deposits. It’s recommended to do this maintenance about once a year in areas with harder water, or every couple of years if water is softer. Given our local water, I suggest annual descaling for tankless units unless you have a softener installed. If your unit hasn’t been descaled in many years, doing it can significantly improve performance and consistency.
- Temperature Setting and “Auto-learn” features: Some advanced units have programming that might adjust flame based on inlet water temp. Ensure your temperature setting on the unit is appropriate (most set around 120°F). If it’s set very high (say 140°F) and you’re mixing a lot with cold at the tap, small changes in flow might lead to noticeable swings. Try setting the unit to a more moderate temp and using less mixing at the faucet – that sometimes yields a steadier temperature at point of use.
- External Factors: Long vent runs or very cold intake air can cause some fluctuations as well, but generally the internal controls handle it. If it’s a windy day and your tankless vents outside, occasional flame disturbance could happen (modern units often have wind mitigation features).
5. Maintenance Musts for Tankless (Prevention):
Tankless heaters require regular maintenance to run reliably – more so, arguably, than tank heaters (which many people ignore until they fail). Key maintenance tasks:
- Flush/Descale the Heat Exchanger: As mentioned, use a pump kit to circulate vinegar/descaling solution through the unit annually. This removes mineral buildup. Some units will actually display a maintenance code after X gallons to remind you.
- Clean the Inlet Filter: There’s usually a filter screen on the cold water inlet. Shut off water, unscrew the filter, and rinse out any debris. I often find little sediment bits or even pipe tape caught there.
- Vent/Air Intake Check: Ensure nothing is blocking the intake or exhaust. If your unit has an intake air filter (some indoor models do), clean or replace it periodically so the unit can breathe.
- Burner Inspection: Every few years (or if you had a construction project that generated a lot of dust, etc.), have the burners checked for cleanliness. Spider webs in gas orifices are a known issue especially in equipment that sits unused for periods.
- Freeze Protection (for outdoor units): While not a big issue in coastal NC, a cold snap below freezing can potentially freeze the water in an outdoor-mounted tankless if power is lost (most have electric heaters to prevent freezing). If a big freeze is coming and power might go out, draining the unit is wise. This is more of an emergency tip, but worth noting as part of maintenance awareness.
If you keep up with these tasks, your tankless should be very reliable. I often tell customers: a tankless is like a car that needs oil changes, whereas a tank heater is like an old tractor you run until it dies. Different philosophies. Neither is “set and forget,” but tankless reward you for the TLC with a longer lifespan and efficiency.
Local Tip: Because many coastal NC homes use propane, always monitor your propane level. If your tankless won’t fire in winter and you’ve tried everything, double-check that propane gauge – running out of gas (or regulator issues in extreme cold) are more common than one might think.
When to call a pro for tankless issues: If basic troubleshooting (checking gas, cleaning filter, descaling) doesn’t fix your issue, tankless units will usually throw specific error codes that correspond to things like “ignition failure” or “combustion abnormal” etc. Many of those require specialized knowledge or parts to fix (like a new igniter, a sensor, or a fan motor). Don’t hesitate to call a certified technician for your brand. Tankless are complex machines, and a pro with the right training can pinpoint and fix issues faster, saving you a lot of headache.
By understanding your tankless system’s needs and quirks, you can avoid the frustration of unexpected cold showers and ensure it serves you well for its full lifespan. Now, equipped with knowledge on both tank-style and tankless heaters, let’s discuss a crucial aspect of home troubleshooting: deciding when you can tackle an issue yourself and when it’s time to call in a professional.
Chapter 5: When to DIY vs. When to Call a Pro
I’m all for empowering homeowners to take care of their homes. Water heaters, however, involve two elements that demand respect: scalding hot water and (if gas-powered) combustible gas. Safety is paramount. In this chapter, I’ll clearly break down which tasks a confident DIYer might handle and which situations absolutely call for a licensed professional (like me or one of my colleagues in coastal NC).
DIY-Friendly Fixes & Maintenance: There are a few things you can comfortably do on your own, especially if you’re reasonably handy and take proper precautions:
- Relighting the Pilot Light (Gas): As discussed in Chapter 2, following the manufacturer’s instructions to relight a pilot is typically safe for a homeowner. Just make sure to wait a few minutes if the first attempt fails (to let gas disperse) and don’t force anything. If the pilot repeatedly won’t stay lit after you release the button, that’s where DIY should stop (thermocouple issues require part replacement).
- Adjusting Thermostat Settings: Checking and adjusting the temperature dial on your heater is simple. You might do this if water is too hot or not hot enough. For electric heaters with two thermostats, ensure power is off before removing panels to adjust – use an insulated screwdriver and replace covers after. Recommended setting is around 120°F for most households (which balances comfort and safety).
- Replacing Accessible Parts (with Caution): Some homeowners successfully replace electric heating elements or thermostats on their tank heaters. This is moderately advanced DIY – it involves turning off electricity, draining part of the tank, and using tools to unscrew elements. If you’re comfortable with wiring and have done similar projects, you can attempt it. Just use the exact replacement parts and follow a guide. Always test for power off with a voltage tester before touching wiring. For gas units, about the only part a homeowner might replace is the thermocouple (they are relatively inexpensive and just screw into the gas valve, with the other end in the pilot flame). If you can access it and have the right size replacement, you could try swapping it out. However, anything beyond that (like the gas control valve, burner assembly) I would leave to pros.
- Flushing the Tank: As detailed earlier, doing a tank flush is a great DIY maintenance task. It requires basic tools (a garden hose and screwdriver to open the drain). Just remember to shut off the heat source before draining to avoid damaging the heater. Flushing yearly can be done by any homeowner and will help prevent many problems. Similarly, cleaning out a tankless unit’s filter is usually simple – check your manual, but it often just involves closing valves and popping out the filter for rinsing.
- Anode Rod Inspection: This is borderline DIY – the anode rod is often very tight and can be hard to remove (you’d need a hefty wrench and sometimes breaker bar leverage). If you feel up to it, you can attempt to inspect or replace your anode rod every 3-5 years. Doing so can extend the life of the tank significantly. If it comes out and is mostly eaten away, replacing it is wise. However, if it’s seized or you’re not strong enough to budge it, don’t strain – many plumbers have struggled with stuck anode rods! It might require an impact wrench or special tool.
- Minor Tankless Maintenance: Homeowners can perform descaling flushes on tankless heaters if they purchase a kit with a small pump, hoses, and bucket. The kits usually come with instructions. It’s a few-step process of isolating the heater, pumping vinegar through for an hour, etc. Many DIYers in forums do this yearly. If you’re comfortable following directions and handling the hoses, go for it. Also, cleaning tankless vents (clearing leaves or nests from outdoor vent terminals) is something you can do with a ladder and some care.
For any DIY, always turn off power or gas as applicable. Wear gloves and eye protection when draining water (sediment can splatter). And if at any point something doesn’t feel right, stop and call a pro. There’s no shame in getting help.
When to Call a Professional: There are scenarios where I strongly recommend letting a trained technician handle the issue:
- Gas Leaks or Gas Valve Issues: If you smell gas around your heater (beyond a brief whiff at startup) or suspect a leak, immediately turn off the gas supply and ventilate, then call the gas company or a plumber. Gas leaks are extremely dangerous. Also, if the problem lies with the gas control valve or burner assembly (for example, the pilot assembly is damaged, or the control valve is not regulating properly), those parts should be replaced by a professional. Improper re-installation can lead to gas leaks or carbon monoxide issues. In fact, many gas control valves require precise setup – we use leak testing instruments after installing any gas component.
- Major Leaks and Tank Replacement: If your water heater tank is leaking (as in the steel tank itself), you need a new water heater. Installing a water heater involves plumbing, electrical or gas connections, and adherence to code requirements (proper venting, earthquake strapping in some locales, drain pan, T&P discharge, etc.). In our North Carolina counties, a permit is typically required for water heater replacements. A licensed plumber will handle the installation safely, including hauling away the old tank. Attempting to patch a leaking tank is not effective; epoxy or stop-leak products are temporary band-aids at best and can fail catastrophically. I once arrived to a home in Wilmington where a DIY patch on a rusty tank gave way – flooding a finished basement. Not worth it!
- Persistent No-Hot-Water after Basic Checks: You’ve tried resetting breakers, relighting pilot, etc., and still no joy. At this point, the issue might be something like a bad heating element, faulty thermostat, or internal wiring issue (for electric), or a failed gas valve, blocked vent, or safety cutoff (for gas). These diagnostics require multimeters, gas pressure gauges, or knowledge of the specific unit’s internals. A pro can usually pinpoint the issue quickly. Plus, if any wiring needs repair, or if you suspect a short (like an element shorting out and tripping breaker), get an electrician or plumber. Electricity and water together can be lethal – don’t risk it.
- Upgrading or Changing Systems: If you decide to switch from a tank to a tankless, or from electric to gas (or vice versa), definitely involve professionals. Not only are there code implications (proper gas line sizing, venting, condensate drains for tankless, electrical circuit upgrades for larger electric units), but also safety testing after installation. It’s a complex job even for experienced installers.
- You’re Not Comfortable or Lack Tools: This is a simple one – even if it’s theoretically a DIY-able task, if you feel unsure, it’s safer to call a professional. For instance, many people can change an electric element, but if you don’t own a multimeter to verify power is truly off, or a socket wrench that fits the element, you might get in over your head. Professionals have the right tools (I carry a special anode rod impact wrench, for example, that makes quick work of stuck rods, and pump equipment for flushing jobs). Hiring an expert can save you time and potential injury.
- Warranties and Insurance: Keep in mind that if your water heater is under warranty, DIY repairs might void it. Manufacturers often require professional service for warranty claims. Also, your homeowner’s insurance might have stipulations about plumbing work – a flood caused by an improperly repaired water heater may not be covered. Pros not only fix the problem but also assume some liability (and they have insurance) if something goes wrong after the repair.
- Emergencies: A scenario I often get calls about: a water heater is spraying water or a major component has failed in the middle of the night. Many plumbing companies (including ones in our coastal NC region) offer 24/7 emergency service. It’s worth calling rather than attempting a hasty DIY fix in an emergency. For example, if your T&P valve is gushing hot water continuously, shut off the water and call us – we’ll address the root cause (could be an overheating issue that’s dangerous). Don’t try to cap a T&P discharge line; that could create a pressure bomb. Emergency professionals exist for a reason – use them when needed.
Balancing Cost vs. Risk: I get it – nobody enjoys an unexpected repair bill. That’s why I aim to educate homeowners (hence this guide!). Doing simple maintenance yourself can prevent costly repairs. But if a repair is beyond basic, the risk of doing it wrong usually outweighs the cost savings. For instance, a cross-threaded gas connection or improperly seated vent could create a hazard that endangers your household. In my experience, homeowners in our area are pretty savvy; many handle their own flushes and minor fixes. Yet, I often get called after a DIY attempt didn’t go as planned. And it’s okay! We’re trained to handle these situations without judgment. I’d rather you call and it turn out to be a minor thing, than not call and have a bigger issue later.
Knowing Your Limits: A good rule of thumb: if the fix requires specialized knowledge or tools you’re not familiar with, or if a mistake could result in significant water damage or injury, lean on a professional. For example, troubleshooting an electronic control board in a tankless heater – that’s not something even a handy homeowner usually tackles. Similarly, if you suspect a cross-connection or mixing valve issue (say hot and cold are blending improperly in your plumbing), a pro plumber can diagnose that quickly.
Finally, remember the value of professional inspection. I often perform annual check-ups for homeowners: I’ll flush the heater, inspect the anode, check gas pressure and flame quality, test the T&P valve, etc. Think of it like servicing your car. This not only keeps the heater running efficiently, it also provides peace of mind. Especially in coastal NC, where things like salt air can corrode parts faster, having a pro look over your unit every year or two is a smart move.
Real-World Scenario: Let me share a quick local story. After Hurricane Florence a few years back, I had numerous calls from Wilmington and Jacksonville homeowners with water heater issues. One particular homeowner in Hampstead had an electric water heater in a crawlspace that got partially flooded. He managed to shut power and drag it out himself (impressive!), but wisely called me to assess it. The heating elements and lower thermostat had been submerged. We opted to replace the whole unit given the extent of water damage (recall that flood-damaged electric components are unsafe). Could he have just dried it out and hoped for the best? Maybe, but the risk of an electrical short or later failure was high. That’s a case where spending on a new heater and pro installation was the right call for safety.
Wrap-Up and Final Tips: In the end, whether you DIY or call a pro, the goal is reliable hot water and a safe home. Pay attention to your water heater – early signs like small leaks, odd sounds, or changes in water quality are your opportunity to act before a catastrophe. With the knowledge from this guide, you can troubleshoot confidently and know your next steps.
I speak for all of us local plumbers when I say: we’re here to help. We live in the same community and understand the coastal challenges. If you’re ever unsure, a quick call can set you on the right path – sometimes we can even just advise you over the phone for a simple tweak. And if you need on-site service, we’ll be there with a friendly smile and the right tools.
Thanks for reading this comprehensive guide. I hope it helps you keep your showers hot and your home safe! Remember, a little maintenance goes a long way, and informed homeowners make the best decisions. Stay warm and take care of that water heater – it’s working hard for you every day.
Stay safe and prepared, Jacksonville.
– Justin Wilder, Owner
📞 Call or text me directly at (910) 750-2312 to schedule your storm check today.
Wild Water Plumbing—Local, Veteran-Owned, and Always Ready.
—
Contact Form
References
- Bluewater Plumbing Heating & Air. (2026). Water Heater Services – Myrtle Beach, SC | Wilmington, NC. Bluewater Plumbing & HVAC.
- Dr. Drain’s Plumbing Services. (2025). Water Heater Troubles? How to Fix Common Problems. Dr. Drain’s Plumbing Blog.
- Ehret Co. Plumbing & Heating. (n.d.). How to Troubleshoot Common Water Heater Problems. Ehret Plumbing Blog.
- U.S. Department of Energy. (n.d.). Storage Water Heaters – Installation and Maintenance. energy.gov.
- Robinson’s Plumbing Service. (2018). 6 Common Tankless Water Heater Problems and Solutions (edited by Eccotemp). Eccotemp Blog.
- Cummings, L. (2023). Rotten Egg Smell in Water Heaters. Arico Plumbing Heating & Cooling.
- Hammett, W. S., & Kirby, S. (2024). How to Salvage Flood-Damaged Appliances (Rev. ed.). NC State Extension.
